在之前的博客 《Nginx_Http_Flv_Module + JavaCV推流RTSP 直播流》中,介绍了在Windows环境下搭建的,在这里将对Nginx环境的搭建做记录详解。
一. 软件包准备
- 下载Nginx包,提供了下载地址:Nginx下载地址
- 下载Nginx_Http_Flv_Module包,提供下载地址:nginx-http-flv-module

这里也可以直接下载我分享的文件:
链接:https://pan.baidu.com/s/1GsJNVTskSd-ueXK7HBQ3Xg
提取码:v0zs
- 在Linux机器上创建 Nginx文件夹
mkdir /usr/local/nginx
二. 环境搭建
- 解压 nginx-1.20.2.tar.gz
tar -zxvf nginx-1.20.2.tar.gz
- 解压 nginx-http-flv-module-master,并放在 /usr/local/nginx目录中
tar -zxvf nginx-http-flv-module-master.tar.gz
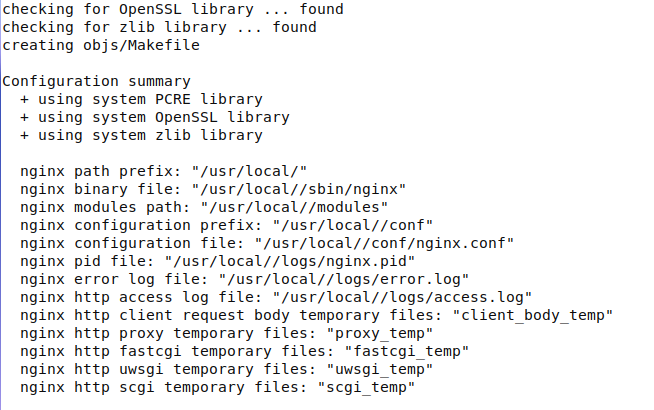
- 将 nginx-http-flv-module 模块添加到Nginx中去,并生成make文件,最后执行安装 Nginx命令
进入到nginx-1.20.2目录执行如下命令
cd nginx-1.20.2

#nginx-http-flv-module添加到nginx
./configure --prefix=/usr/local/nginx --add-module=/usr/local/nginx/nginx-http-flv-module

#make安装
make && make install
- 配置修改nginx.conf,具体配置如下
#user  nobody;
worker_processes  10;

#error_log  logs/error.log;
#error_log  logs/error.log  notice;
#error_log  logs/error.log  info;

#pid        logs/nginx.pid;


events {
    worker_connections  10240;
}


http {
    include       mime.types;
    default_type  application/octet-stream;

    #log_format  main  '$remote_addr - $remote_user [$time_local] "$request" '
    #                  '$status $body_bytes_sent "$http_referer" '
    #                  '"$http_user_agent" "$http_x_forwarded_for"';

    #access_log  logs/access.log  main;

    sendfile        on;
    #tcp_nopush     on;

    #keepalive_timeout  0;
    keepalive_timeout  65;

    #gzip  on;

    server {
        listen       80;
        server_name  localhost;

        #charset koi8-r;

        #access_log  logs/host.access.log  main;

        location / {
            root   /usr/local/nginx/nginx-1.20.2/html;
            index  index.html index.htm;
	    charset utf-8;
        }


        #error_page  404              /404.html;

        # redirect server error pages to the static page /50x.html
        #
        error_page   500 502 503 504  /50x.html;
        location = /50x.html {
            root   html;
        }

        # proxy the PHP scripts to Apache listening on 127.0.0.1:80
        #
        #location ~ \.php$ {
        #    proxy_pass   http://127.0.0.1;
        #}

        # pass the PHP scripts to FastCGI server listening on 127.0.0.1:9000
        #
        #location ~ \.php$ {
        #    root           html;
        #    fastcgi_pass   127.0.0.1:9000;
        #    fastcgi_index  index.php;
        #    fastcgi_param  SCRIPT_FILENAME  /scripts$fastcgi_script_name;
        #    include        fastcgi_params;
        #}

        # deny access to .htaccess files, if Apache's document root
        # concurs with nginx's one
        #
        #location ~ /\.ht {
        #    deny  all;
        #}
    }
##########重点##########
    #nginx+rtmp+nginx-http-flv-module环境搭建配置
    server {
        listen       8800;

        #charset koi8-r;

        #access_log  logs/host.access.log  main;

        location / {
            #root   E:/service/VideoMonitorWEB3.0;
			root  html;
            index  index.html index.htm;
        }

        location ^~ /uwb/ {
            proxy_pass http://127.0.0.1:18080;
            proxy_send_timeout 1800;
            proxy_read_timeout 1800;
            proxy_connect_timeout 1800;
            client_max_body_size 2048m;
            proxy_http_version 1.1;
            proxy_set_header Upgrade $http_upgrade;
            proxy_set_header Connection "Upgrade";
            proxy_set_header Host $http_host;
            proxy_set_header X-Real-IP $remote_addr;
            proxy_set_header X-Forwarded-For $proxy_add_x_forwarded_for;
            proxy_set_header X-Forwarded=-Proto $scheme;

            #proxy_http_version 1.1;
            #proxy_set_header Upgrade $http_upgrade;
            #proxy_set_header Connection "upgrade";
        }

        #error_page  404              /404.html;

        # redirect server error pages to the static page /50x.html
        #
        error_page   500 502 503 504  /50x.html;
        location = /50x.html {
            root   html;
        }


        location /live {
            flv_live on; #打开HTTP播放FLV直播流功能
            chunked_transfer_encoding on; #支持'Transfer-Encoding: chunked'方式回复

            add_header 'Access-Control-Allow-Origin' '*'; #添加额外的HTTP头
            add_header 'Access-Control-Allow-Credentials' 'true'; #添加额外的HTTP头
        }

        location /hls {
            types {
                application/vnd.apple.mpegurl m3u8;
                video/mp2t ts;
            }

            root html/hls;
            add_header 'Cache-Control' 'no-cache';
        }

        location /dash {
            root html/dash;
            add_header 'Cache-Control' 'no-cache';
        }

        location /stat {
            #推流播放和录制统计数据的配置

            rtmp_stat all;
            rtmp_stat_stylesheet stat.xsl;
        }

        location /stat.xsl {
            root html/stat; #指定stat.xsl的位置
        }

        #如果需要JSON风格的stat, 不用指定stat.xsl
        #但是需要指定一个新的配置项rtmp_stat_format

        #location /stat {
        #    rtmp_stat all;
        #    rtmp_stat_format json;
        #}

        location /control {
            rtmp_control all; #rtmp控制模块的配置
        }

        # proxy the PHP scripts to Apache listening on 127.0.0.1:80
        #
        #location ~ \.php$ {
        #    proxy_pass   http://127.0.0.1;
        #}

        # pass the PHP scripts to FastCGI server listening on 127.0.0.1:9000
        #
        #location ~ \.php$ {
        #    root           html;
        #    fastcgi_pass   127.0.0.1:9000;
        #    fastcgi_index  index.php;
        #    fastcgi_param  SCRIPT_FILENAME  /scripts$fastcgi_script_name;
        #    include        fastcgi_params;
        #}

        # deny access to .htaccess files, if Apache's document root
        # concurs with nginx's one
        #
        #location ~ /\.ht {
        #    deny  all;
        #}
    }
    #nginx+rtmp+nginx-http-flv-module环境搭建配置
##########重点##########

    # another virtual host using mix of IP-, name-, and port-based configuration
    #
    #server {
    #    listen       8000;
    #    listen       somename:8080;
    #    server_name  somename  alias  another.alias;

    #    location / {
    #        root   html;
    #        index  index.html index.htm;
    #    }
    #}


    # HTTPS server
    #
    #server {
    #    listen       443 ssl;
    #    server_name  localhost;

    #    ssl_certificate      cert.pem;
    #    ssl_certificate_key  cert.key;

    #    ssl_session_cache    shared:SSL:1m;
    #    ssl_session_timeout  5m;

    #    ssl_ciphers  HIGH:!aNULL:!MD5;
    #    ssl_prefer_server_ciphers  on;

    #    location / {
    #        root   html;
    #        index  index.html index.htm;
    #    }
    #}

}
##########重点##########
#rtmp配置
rtmp_auto_push on;
rtmp_auto_push_reconnect 1s;
rtmp_socket_dir /tmp;

rtmp{
	out_queue 4096;
        	out_cork 8;
       	max_streams 128;
        	timeout 15s;
        	drop_idle_publisher 15s;
        	log_interval 5s; #log模块在access.log中记录日志的间隔时间,对调试非常有用
        	log_size 1m;	 #log模块用来记录日志的缓冲区大小
       	server{
          		listen 1935;
          		server_name  127.0.0.1:8800;	#当模块中,只有一个server时,可以不配置server_name,nginx对于请求,当找不到匹配的server_name时,会默认发给第一个server进行处理。
          		application myapp{
                	live on;
                	gop_cache on;	#打开GOP缓存,减少首屏等待时间
			#gop_cache off;
          	}
         	application hls{
               		live on;
                	hls on;
                	hls_path /usr/local/nginx/html/hls;
         	}
         	application dash{
                	live on;
                	dash on;
                	dash_path /usr/local/nginx/html/dash;
         	}
	}
}
##########重点##########
- 启动Nginx
#检验配置文件是否错误
nginx -t

#直接在nginx目录下启动
nginx

#重启
nginx -s reload

#查看nginx是否启动
ps -ef | grep nginx
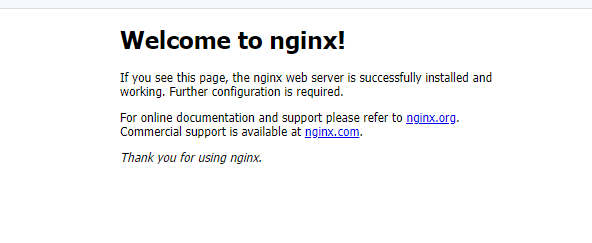
- 访问验证
- JavaCV推流,详细见文章:《Nginx_Http_Flv_Module + JavaCV推流RTSP 直播流》
以上Nginx_Http_Flv_Module的搭建环境,如果你在搭建中遇到了问题,可以留言一起沟通讨论!